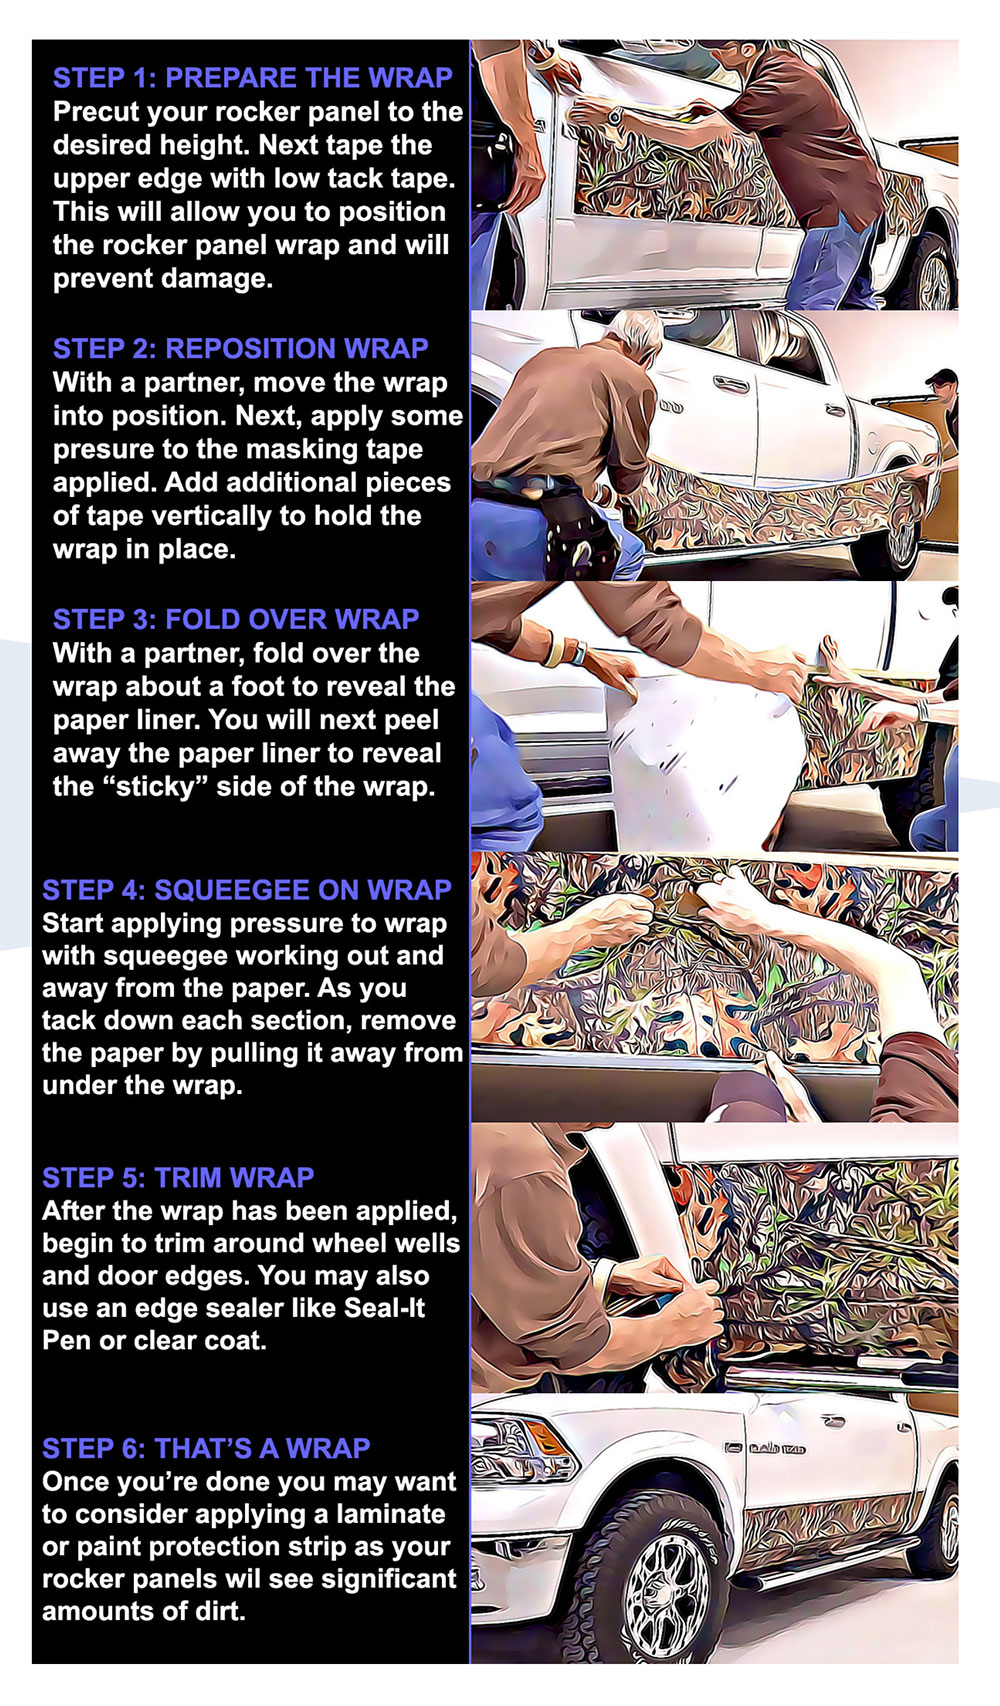
Six Steps to Wrapped Rocker Panels
Have you ever wanted to get that custom wrapped rocker panel look you see in hunting and fishing magazine ads? Have damage on panels or just want to prevent it before it
happens? If so, the this 6 Step DIY tutorial is for you. Buy directly from us
and pick up a 12-inch by 120-inch roll of Rwraps™ Camouflage vinyl or choose any
of our hundreds of other vinyl colors and styles and trim to it yourself.
Whatever you choose, you'll love how easy it is to apply a rocker panel wrap to
your car or truck and get awesome results.
Clean and Clean Again
We've actually taken the time to write a full post already about the
importance of cleaning so if you haven't seen it check it out and make sure
you follow all the steps. Your results will literally only be as good as your
cleaning and preparation so don't skimp on this step.
Step 1: Preapply Tape to Hold Wrap in Place
Apply a strip of tape to the upper edge of your wrap. By leaving half of the
low-tack tape hanging over the edge of the wrap you'll be able to stick the
panel wrap to the vehicle for easier installation,
Step 2: Move Wrap into Position
With a partner, move the wrap into place. You can now use your masking tape
to stick it into place. Apply additional strips of tape vertically to hold the
weight of the wrap.
Step 3: Fold Over Panel Wrap
Fold over about a foot of the wrap, removing the masking tape where
necessary. This will allow you to peel away the paper liner in the and to begin
squeegeeing the vinyl on.
Step 4: Apply Vinyl Wrap with Squeegees
Working away from the liner and in downward strokes, apply the film. Wrap
films have air-release adhesives so it's not important to apply a lot of
pressure at first. If bubbles or creases form, lift the film with tension and
squeegee down again.
Step 5: Trim to Fit
Once you have applied the wrap and squeegeed out all air, trim around wheel
wells and door edges.
Step 6: That's a Wrap
Now that you're done you can sit back and enjoy. If you want to increase the
life of your wrap you can consider adding paint protection and applying sealer
to the edges.