
DIY Removable Furniture Wraps
If you're like most of us, you've probably got a house full of IKEA furniture
that's seen better days. In today's post we're going to show you how we used
less than ten dollar's worth of
ORACAL®
631 Gentian Removable Furniture Wrap film to upgrade an old IKEA GILBERT
chair that had seen better days. As you can see from above, the process is quick
and easy and took no more than 15 minutes from start to finish to get a pretty
sweet, two-tone look that would take hours to do with paint. And, best of all,
since this matte film is removable, we can remove the furniture wrap whenever we
want with no hassle and apply another of over fifty great colors! See how we
transformed an old, dirty IKEA chair from a scuffed piece of furniture ready for
the scrap heap to a two-toned beauty fit for any modern kitchen.
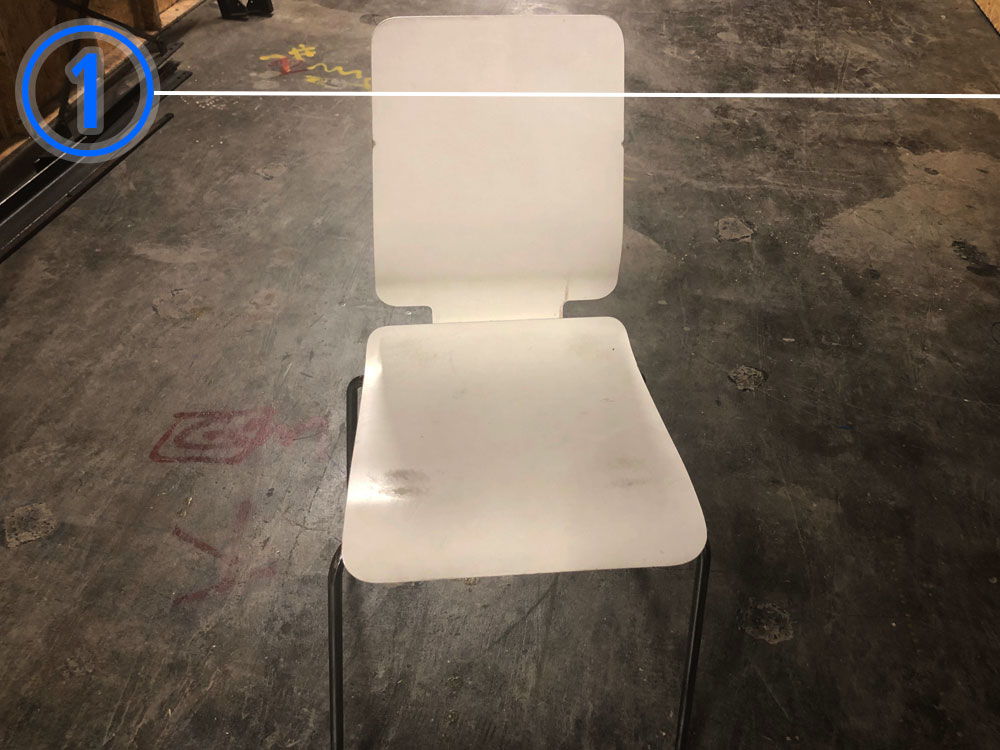
Step 1: Choose Your Victim
Inspect the piece of furniture you intend to wrap for deep scratches and other
imperfections. Sand down any rough edges and fill in any holes before applying
wrap. Even though this 631 Removable Furniture Wrap film has a matte finish that
can help to hide small imperfections, larger ones will show through.
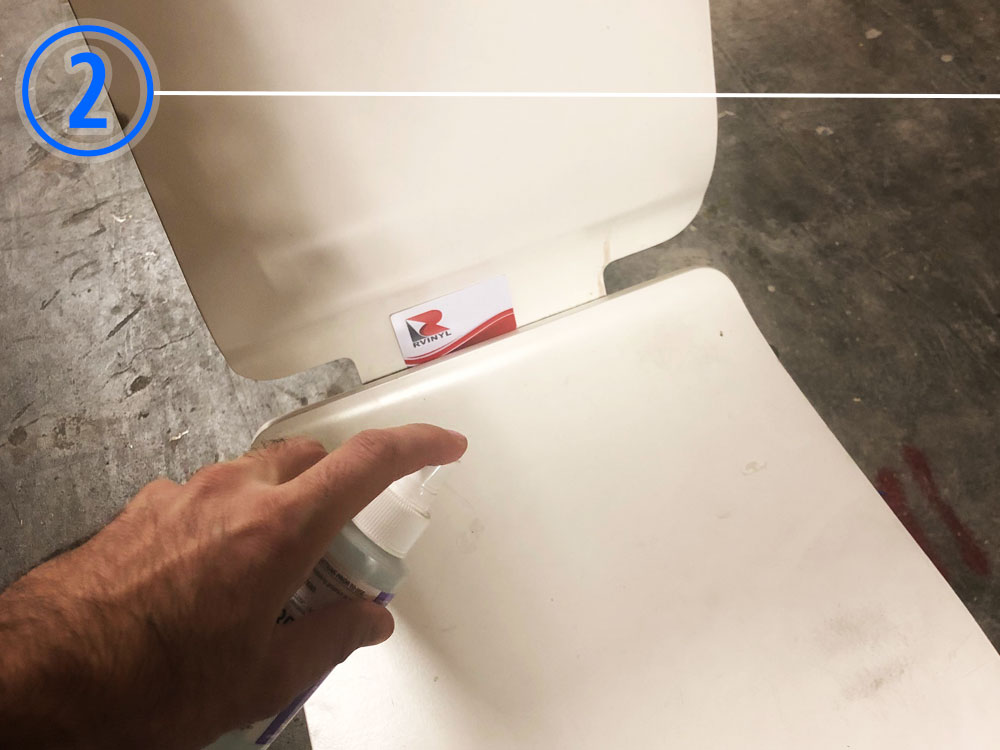
Step 2: Clean Your Furniture
Using Rapid Prep of isopropyl rubbing alcohol, clean the surface you're going
to wrap to ensure there is no dust, dirt or grease on the surface. Any
particulates or oily substances will cause the film to come off (delaminate) so
clean and dry thoroughly.
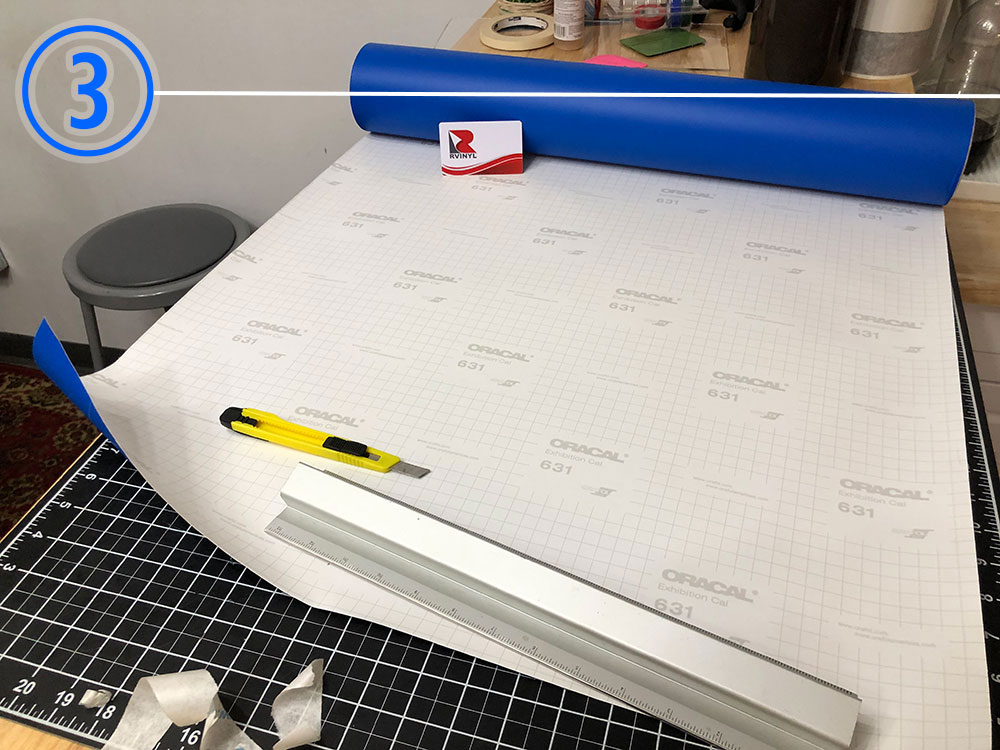
Step 3: Measure & Cut
Measure the surfaces you intend to wrap. Give yourself an overage of at least an inch all the around each section to be wrapped. Next, cut out your sheets with a ruler and razor.
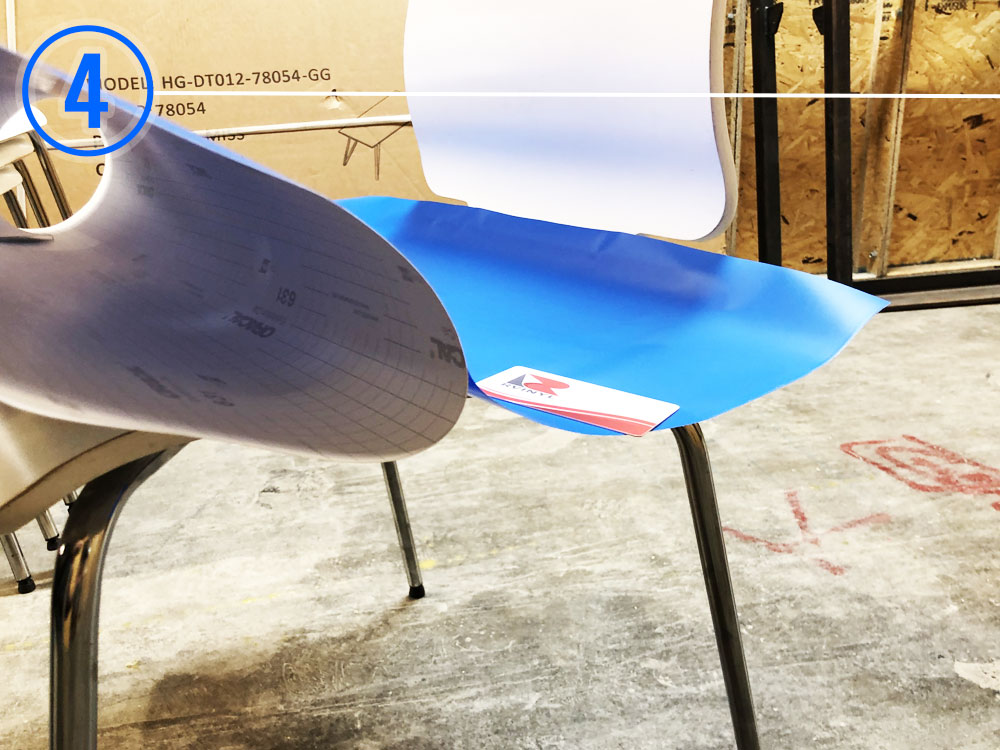
Step 4: Tack. Peel. Apply
Peel the film about four to six inches off the liner. Tack it to the surface and then begin to squeegee it on with your dominant hand while pulling the liner slowly out with your non-dominant hand.
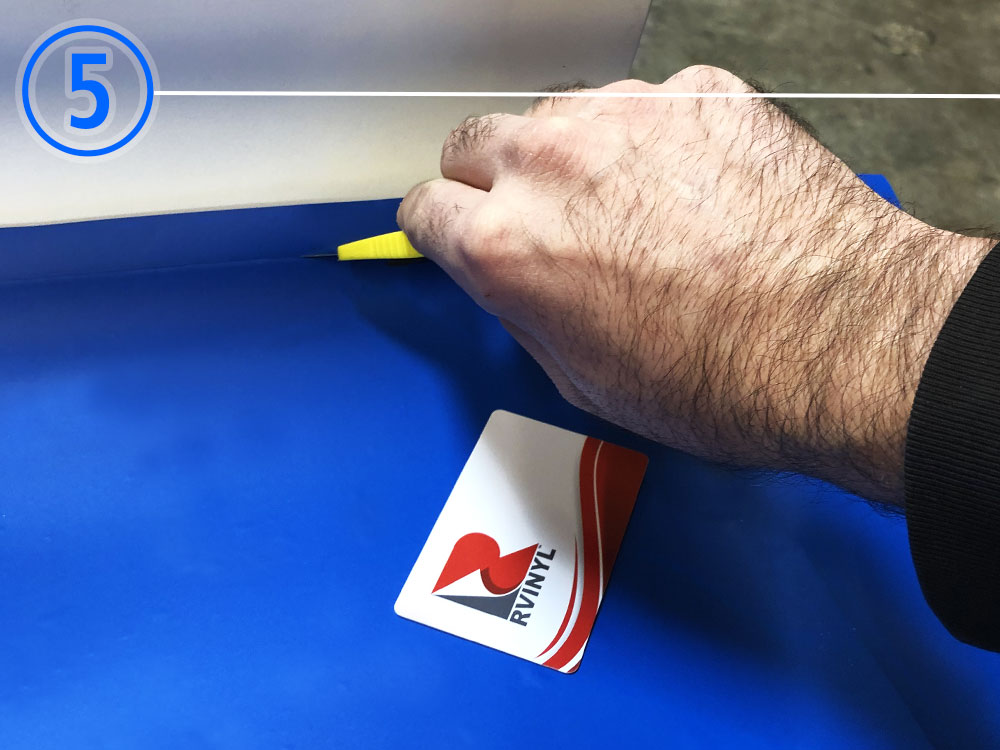
Step 5: Trim Excess Film Away
Once you've position the wrap on your furniture and removed large bubbles by re-lifting and re-applying the vinyl, you can begin trimming the excess away. Since we were going for a smooth two tone look we weren't concerned about tucking or wrapping the film over the edges. As a result we held the blade at a 45-degree angle to get a god edge on the vinyl.
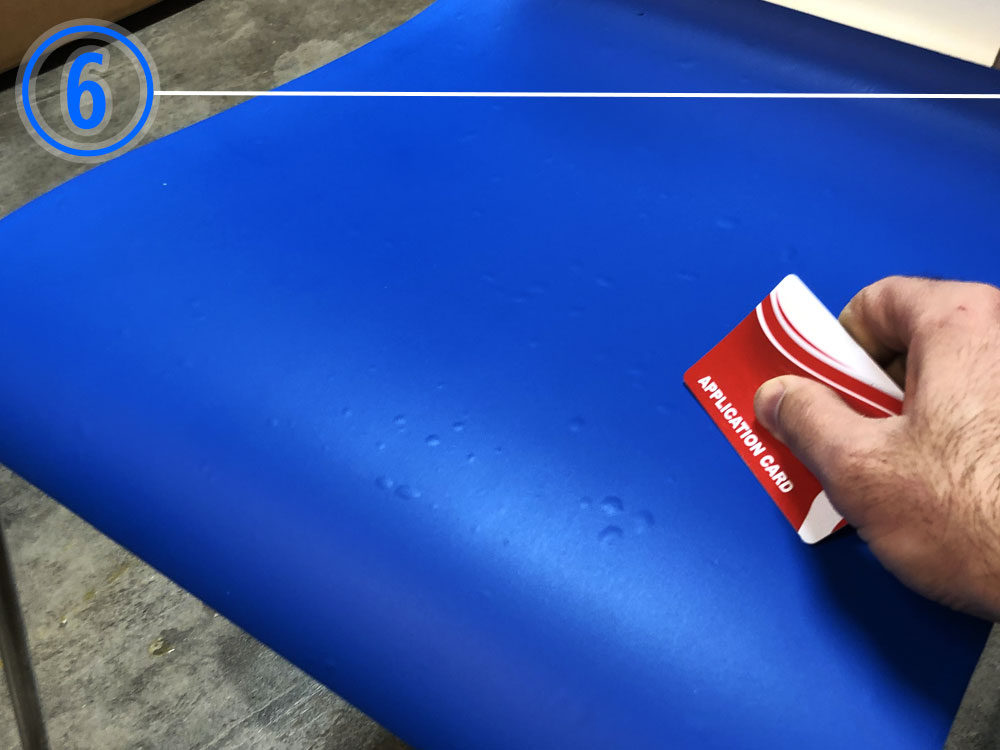
Step 6: Squeegee Out Bubbles
Squeegee out any remaining bubbles. Work carefully towards the edges of the film. Do not be overzealous as you can cause permanent creases if you fold bubbles over onto themselves. Any
bubbles you can't run to the edge you can pop with a pin.
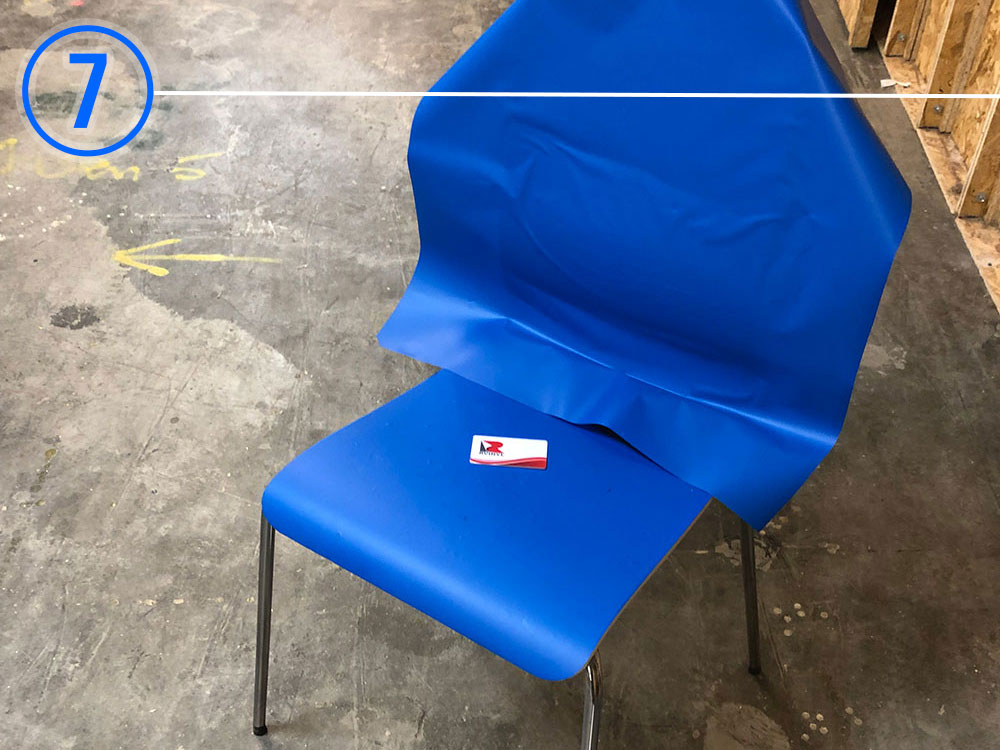
Step 7: Repeat Above for Each Section
Literally repeat all of the steps above for every section you're wrapping.
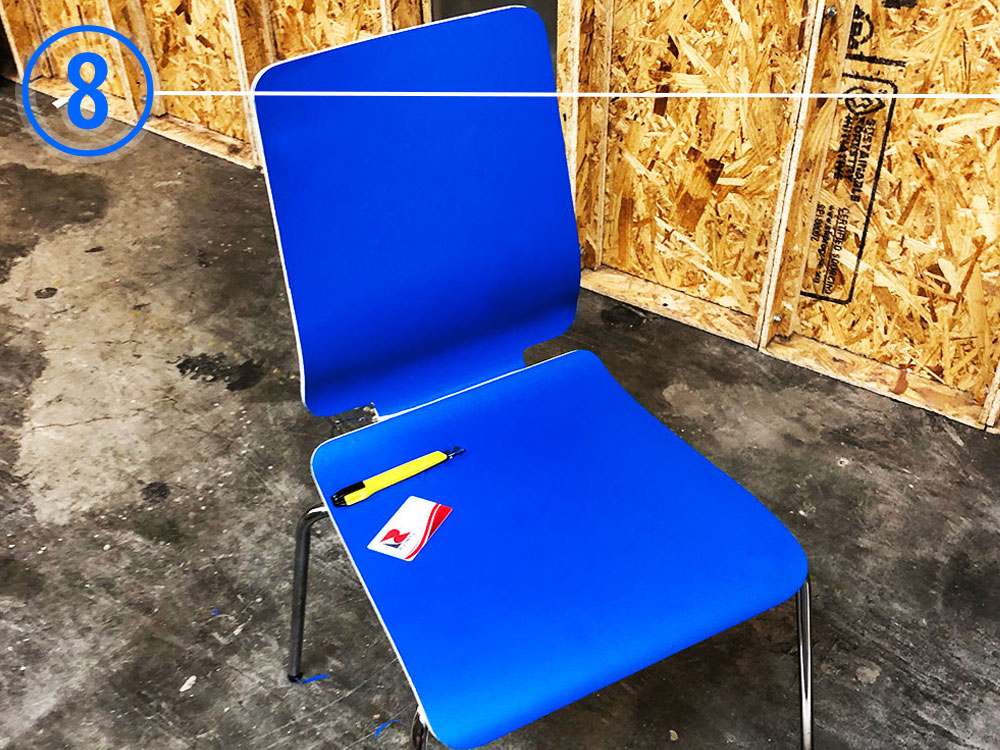
Step 8: Chair Wrapped
This isn't so much a step as it is the end of the road. We were really please
with the results of this chair wrap. We honestly hadn't expected to like the
matte Gentian color as much as we did and were really surprised by how quick it
was to wrap this dirty, old IKEA chair. We imagine that if you were doing a
large bookcase or credenza you might need a half an hour but it seems like most
removable furniture wraps can be done in under half an hour. Here's a quick wrap
up with the pros and cons we found using this ORACAL 631 Matte Removable
Furniture Wrap film.
Pros
- Forgiving, low-tack film that was easy to reposition.
- Cheap vinyl. Our chair cost less than $15 in vinyl to wrap.
- Quick. It took longer to edit the photos and write this post than it did
to wrap the Gilbert.
Cons
- 631 film isn't an air-release film so you have to spend more time
working out bubbles.
- Since it's matte you have to clean it with mild soap if oils or
fingerprints smudge it.
- This furniture wrap vinyl is calendered which means it's more brittle
than a cast film.
In sum, we were really please with the performance and potential of this
matte removable furniture vinyl. It seems like a great way to protect chairs,
tables and desks in a bunch of fun colors that would go great in any kid's room.
Take a look and let us know what you think.